
I bought this basic lazy susan at IKEA about a year ago, because it was solid wood, and was cheap. I knew I wanted to change the color. I don't have anything this light tone of wood, so I decided to stain it. Here it is before stain.

It was very shiny, so I made sure to start by giving it a good sanding using rough sand paper, then working my way up to 220 grit, to really smooth it out. This is what I used as a pre-conditioner and a stain.

After 2 coats of stain and a very light sanding it was much better.........but not done yet!

I wanted to add some old character to it. I love all the french typography (and everything actually) that The Graphics Fairy has on her site. So I browsed her site and decided on this.

To transfer it, I used a technique I have never used before, but found on her site. I rubbed white chalk all over the back of the piece of paper from my printer. Then shook off all the excess chalk dust and centered the paper on the lazy susan. I taped it down to make sure it did not shift and then used a ball point pen to trace everything. This took me the longest, but really only took about 30 minutes. (I did get a killer hand cramp though!!!!)
This is what it looked like when I took the paper off.
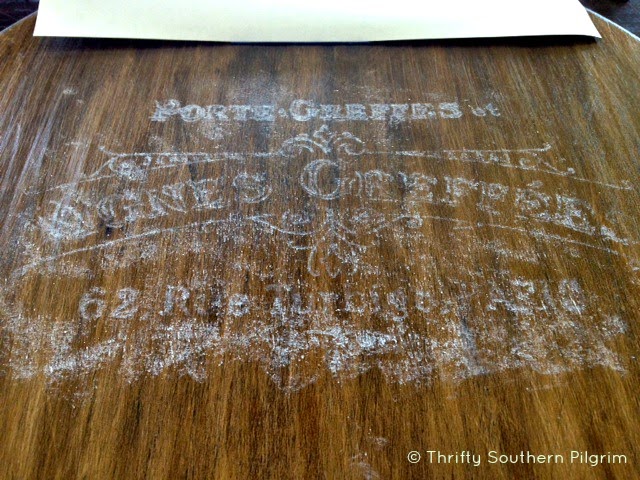
I used a sharpie to trace over the chalk!

I had to use several sharpies because the tips would get some chalk on them and it would not work as well. I just kept going over it until I got what I needed. Then I used Miss Mustard Seed's Antiquing Wax over the entire surface and here is the finished result. What do you think?


One more time - because who can resist a Before and After?:


Let me know what you think! Have a good ending to your week and stay cool.....
Linking up to: Bloom Designs, The Dedicated House, Beyond the Picket Fence, Thrifty Decor Chick Beyond the Picket Fence
I love how this came out! It is so much prettier than the plain ones you can buy. I also liked the chalk technique. I am going to have to try that one.
ReplyDeleteThank you Jennifer! I was very skeptical about the chalk technique, but figured I could just wipe it off, if it did not work. It also helped to use the original printed version as reference when going over the chalk with that Sharpie!
DeleteThis turned out wonderful! Thanks so much for sharing it at the Vintage Inspiration Party! I'm giving you a "shout out" on the Knick of Time Facebook page here - https://www.facebook.com/KnickofTime
ReplyDeleteThank you Angie!
DeleteI love this!! It really turned out beautifully. Thanks for sharing!!!
ReplyDeleteThank you Connie, I love it too!
Delete