Showing posts with label furniture. Show all posts

Sunday, November 30, 2014

Craigslist Chairs Redone

Hello, I hope everyone had a great Thanksgiving and was able to spend it with some family and/or friends!

Today I am going to share a project that has been completed for a while, but again, with baby here it has s..l..o..w..e..d.. me way down! So, I am just getting to putting this post together now.

If you have been to my blog before you may remember these chairs from a Thrifty Finds Friday a while back. If you are new here, WELCOME - I am glad you are here. You can read about the chairs and price here.


The first order of business was to scrub these babies down. It is hard to tell in these photos but, they had mold spots on them. It was not difficult to clean them, it was just a little bit of a cardio workout! I scrubbed so hard my heart rate was elevated the entire time I cleaned these! I just used warm soapy water and a scrub sponge, and some good ole elbow grease.

Then I left them outside to dry thoroughly.

Next I took off all the seat and got to work on them. They were a light wood which does not go with any wood tones in my home, so I sanded them and stained them.

Here is a closeup of a seat before I stained, and after I sanded it.


Then I used the same stain that I used for the kitchen table when I stained it years ago (this is the table my chairs are going around). It is the color Java in General Finishes stain. Below is a picture of what the chairs looked like after one coat of stain. It looks very streaky in this picture, it was not so streaky in real life. It was even less so after 2 coats.


Here they are all balanced on paint cans drying!


I did 2 coats of stain and 3 coats of poly.

I have no pictures of me spray painting the chairs. But I used Heirloom White to spray these chairs. I sprayed them upside down first, then right side up. I used lots of coats of very light sprays, that keeps the paint from dripping. This came in a Matte finish, which I don't like on furniture, so I sprayed a poly on once the white had dried. When all the painting was done, I put the seats back on the chairs. This is how they look around my table. I love them and I think they came out so nice.


Did you notice the white front door in the background? That should be black by then end of the week. If all goes as planned!

The blue/gray wall in the background with the white gallery shelf you can read all about on this gallery wall post.

If you are interested in the wall planking you can read about it on the planking the kitchen wall post. Or read about the bathroom wall planking here.

Next up: I am working on wainscot in the dining room. I am going to do the same style as in our last home. You can read about that here. Oh - and I need to get the Christmas decorations out and put up.....

Please like me on Facebook and get updates there

Thanks for reading and make sure to visit soon!


I'm sharing here today:
Skip To My Lou
The Girl Creative, Thrifty Decor Chick, Crafty Allie, Green Willow Pond, Miss Mustard Seed

Thursday, May 22, 2014

Painted and Stained Craigslist Dresser

I bought this little dresser from Craigslist, just a couple of weeks after we moved in to the new house. So, it sat in my garage while I got more important things done, like unpacking!


The poor thing looked nothing like it does now. It was all a lighter shade of brown. Nothing exciting at all. There was also a lot of wood damage to the top and to some portions of the sides at the bottom.

I have just realized that I never took any before pictures of this dresser. How is that possible? My brain was way to overloaded during moving time, and my husband was away right after we moved. That is my excuse.....

Anyways, although it is not my style, it was a well made piece with dove tail drawers, and solid wood, and I thought it was a little interesting. Mainly, though, it was going to fit perfectly in the space I was intending it for!


The top of it was in rough shape. There had been some patch jobs in the past, and the finish was bubbled in a large area. I did a major sand with my little mouse smoothed out the finish. I chipped away the old patch jobs, which I think also involved glue for some reason...... Then I used stainable and paintable wood filler to fill the patches. It took me at least 3 coats, with sanding in between, to get them filled and smooth.

Here is a close up of that area. I was dissapointed with how the "stainable" wood filler looked. It did not take the color well and looked like sawdust. I thought about just painting the entire thing, but that was too much work. I needed to start using it ASAP. I have NO.PATIENCE....at...all...


One area is mostly covered by a little lamp, and the other area in the front does not bother me as much as I thought it would. Maybe that is because it is between 2 chairs and is not something that you walk by and look down at, as you would in a foyer for example.

I switched out the knobs on the top 2 drawers for glass ones from Hobby Lobby. The metal post that you can see from the front was silver. I just used a little Rub N Buff to change the color to gold. Yes, I know I ruined the finish by having larger knobs on before I found these...... I promise it is not as noticeable in real life...


The hardware for the bottom 3 drawers is original, and was hideous. The center portion had a faux wood paint treatment on it. The ends were dull and dark. With my dad's help we sanded them to ready them to accept spray paint. When we did that we found that they were shiny gold underneath. I was planning to spray them gold..... so...... we soaked them in paint thinner for about an hour. I kept checking them and brushing off the paint with an old toothbrush. Eventually, I just used some fine sandpaper and it took all the old paint off. Next, I used Brasso to polish the handle and end part, getting all the old black dirt off. I love the finished result. Antiqued gold! Just what I wanted.


Here are some more angles of the dresser. I love how it turned out and it provides a ton of hidden storage.


I hope you like the dresser as much as I do. I promise I will try to remember to take Before pictures for the next project!

Today I am linking up with these great blogs: The Craft Dictator, The Pin Junkie, DIY Vintage Chic, Miss Mustard Seed, Southern Hospitality, Green Willow Pond
Confessions of a Serial DIYer

Have you liked me on Facebook yet? Or have you subscribed via email, so my new posts all get delivered to your inbox? You can subscribe on the bar on the right.

Have a great Memorial Day weekend everyone!!!!

Monday, December 16, 2013

The stools are {FINALLY} done!

Well, maybe that title is untrue. The stoolS are not done. Rather, one stool is done. But now I feel like the second stool will go much quicker, except that is the one I have to fix a little on the legs.

If you remember from this post, this is the stool I got for $2.99 so I am not going for perfection. If they don't last long, it was not a big investment lost!

The only supplies I needed to buy for the first stool was the trim I added to the rough edge below seat. This trim was on sale at Hobby Lobby for 0.44/yard. I needed a little over 2 1/2 yards (but that is for both stools) so I paid under $1.50 for it. I had the paint, stain, wax and paint brushes on hand.

This is a picture of the stools when I bought them.


I used a paintbrush and can of paint for this project, as planned. I was unsure of how that would go. I wanted the kind of finish and strength you get from paint from a can, but I also wanted the ease of spraying. I am happy to report that the brushing part was not bad. What I did do was turn the stools upside down (after removing the seat from the legs). This way I painted on the underside of everything first, then turned it right side up and painted from the view of looking down. I did not miss many areas doing it this way. I did do TWO coats of paint letting it dry for over 24 hours in-between (mostly because it was humid and I wanted a strong finish since feet/shoes would be on the bottom rung).

This is after one coat. Oh - I also did a sanding to the entire chair, including the cane, before I started painting or staining.


The next photos show the stain I used and how I applied it to the cane using a paintbrush. After getting the entire top stained I lightly rubbed it off and then let it dry for a couple days (humid weather -- remember).


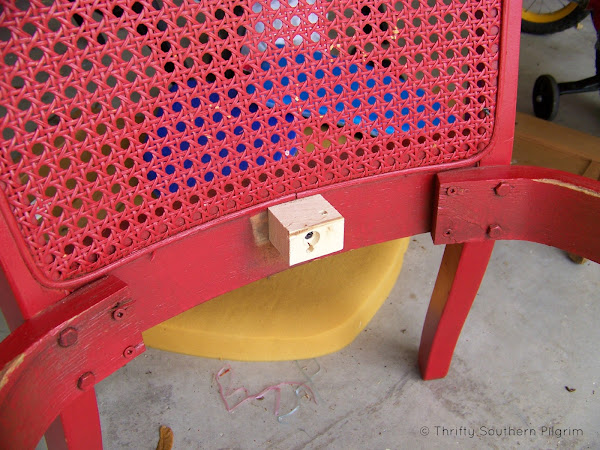
After finishing the top and the legs and putting them back together I had to cover the ugly plywood showing under the seat. These stools at some point during their lifetime, were repaired or redone resulting in a plywood circle under the cane top. This rough edge shows and I had to cover it. I found a nice neutral trim and glued it to the plywood.


So here is the finished stool. I am very happy with how it turned out and can't wait to finish the other one and get them to the new house!


The new house is getting close. Like so close I don't even want to think about it too much. We are scheduled to close in THIRTY SEVEN days! Whoo Hoo! I don't even want to tell you what is going on between now and then and what my list looks like.

Thank you for spending time reading my blog today! Have a great week - the last full week before Christmas.


Visit these blog linky parties where I am linking up: Between Naps on the Porch, Rain on a Tin Roof, The Dedicated House, Southern Hospitality

Thursday, April 18, 2013

Chair Part 2

Before I start the post I just want to say that I had wanted to do this post a few days ago. However, I just could not get it done, I was too sad. My little one and I watched the Boston Marathon on a live stream on the computer and were following my friend who was running, online. I was so happy, explaining to my son how I ran it a LONG time ago, and how we always went to watch it when I was a child/young adult/adult and how amazing it is to watch the elites come through, and they look as if running on fluffy clouds. Then how equally amazing it is to see everyone else come by and see how hard they are working, and usually they have smiles on their faces. How amazing it is that every spot along the entire route has people cheering for the runners. Anyways, that all changed with the bombings. I have cried a lot thinking about what happened and all who were injured. My heart breaks for the families of the 3 dead. My heart aches for all the injured people and their families and friends. However, my heart lightens when I think about all the rescue, police, volunteers, runners, spectators who pulled together in an instant and helped others who were in critical need. It lightens when I think about my friend, an ER nurse, who was working in the city Monday and all her co-workers who came together as a team to help all the victims they received from EMS. I pray for anyone and everyone affected by this terrible event.


When we left off I had fixed the chair's issues and removed all the fabric from the seat. Of course that was well over one two three weeks ago...... My problem was finding the right material. I went to several stores more than once each. The first material I found I love, but I got it home and did not like it at all (of course I mistakenly did NOT take the chair with me when I bought that). Luckily it looks great with the material I did use and I plan to make a little bolster pillow with it. I like the material that I finally found, but not sure if I love it on the chair or not. Time will tell and I can always replace it in the future using it for another project. My other difficulty is that I don't know where I am going to use the chair yet, so I want to have a neutral fabric so that I can be flexible on my placement of my new chair.

Here is the chair primed with grey spray primer (I did a light sand of the entire chair first). This photo shows only 1 coat, I did 2 coats to cover the red.


To get the specifics up to this point see Chair Part 1

For the finish I was hoping for an aged look, with greys and browns with a hint of gold. Kind of Frenchy maybe? Not really like anything in my home now, but I am hoping to lighten some of the furniture up in the near future.

Here is how I painted the chair:

After the primer went on, I dry brushed a lighter grey color. It was a BM color and probably Cumulus Cloud (the wall color in my boys' room). Next I dry brushed brown paint over it. I want to emphasize DRY brushed, because it is easy to get too much on. I really did not use much paint at all. Last, I took it outside and sprayed a gold spray paint around it to just hit it with a tint of gold. I love how that turned out. It is a little more blue grey than I would like and I think that is due to the grey tinted primer. I will probably not use that next time. But I do like the overall effect. Different than most my current furniture, but I still like it!


Here is how I recovered the seat, replacing the foam:

I started out with the foam. I used the old foam as a template, as well as the wooden seat. The old foam was about 2" thick, but in bad shape. My choices for replacement were 2" and 4". I chose the 4" thick foam, remembering that the chair when I found it was not very comfortable. After using a sharpie marker to mark my foam I used a large serrated bread knife to cut it. I have read that it is easiest with an electric carving knife, but I don't have one. Using the knife I did was so easy, just like cutting with a hand saw. I was relieved at how easy it was.


Then I put the batting on the floor and put the foam and seat on top of that, lining them up.


Next I knelt on it and pulled the batting evenly up over the wood and stapled. I find that kneeling on it gives the foam just enough squish (does that make sense?!?) that the finished product comes out nice and formed looking with material taut.


Next I covered the foam and batting with the new material the same way as outlined for with the batting. It is just more difficult due to the thickness of the fabric and I had a few staples that did not actually catch the wood and I had to redo with more pressure. I used staples freely so that I will not have to redo it anytime soon! I did not take pics of this process....

Here is my finished chair! It is surprisingly comfortable. Everyone in our house, large adults and small children all agree and love it too.


Just ignore that clothes pin holder hanging on the line in one photo. I can't believe I did not catch that! I line dry when I can and had been doing laundry earlier and did not move it....oh well....
Thanks for visiting today!


I'm linking up to these parties:

The Stone Gable
Miss Mustard Seed - Furniture Feature Friday

Friday, March 22, 2013

Chair Part 1

I found a chair on the side of the road. Of course I could not leave it there but had to rescue it! It has been in storage for at least 6 months. I recently brought it to my garage, along with all the other projects I have going on, to completely redo it.

It had some of the veneer peeled off, one arm was off but the caning was (almost**) perfect.


I first took the pad off and sat down with some needle nosed pliers and a flat head screwdriver. After taking out a bunch of staples I realized that there was another fabric underneath. Then I realized there was a total of THREE fabrics on this chair. All stapled in........ The staples holding the underneath fabric were rusted....


After taking all 3 fabrics off - which I saved to use as a pattern - I realized that the foam was not in good shape. I guessed this since the chair was not very comfy when I tested it. I kept it to give me a guide for buying a new piece of foam.


I also had to fix one arm. That involved a new screw and some wood glue. I forgot to take any pictures of the arm before. Bad blogger, as this was done after starting this blog. oops...

The little piece of wood that was a rest for the back of the seat was loose and I could not tighten it any. So, I removed it, grabbed a scrap piece of wood and made a new support.


I used wood filler in the cracks and then sanded with 600 grit when dry. Next up is to prime with spray paint and then paint. I think I am going with a grey. But I want a brownish and goldish old look to it. Not sure yet how I will accomplish that. I usually just experiment. If I hate it I can always paint over it.

Then the foam and batting and then the fabric. I have not found the fabric yet.

Here is a peek with one coat of primer.......


Hopefully I will be showing the finished chair within a week. Writing it out might just get my butt in gear and get me motivated!!!!

Have fun with your furniture restoration projects!

Linking up to:
Miss Mustard Seed