Showing posts with label baby gifts. Show all posts

Tuesday, November 5, 2013

Baby Burp Cloths

I think most people understand the importance of burp cloths for infants, even if you have never had children of your own. These little cloths get used almost hourly and get tons of abuse use. They get washed at least twice weekly, possibly daily, and can usually be found all over one's home, car, and shoved in any bag available.

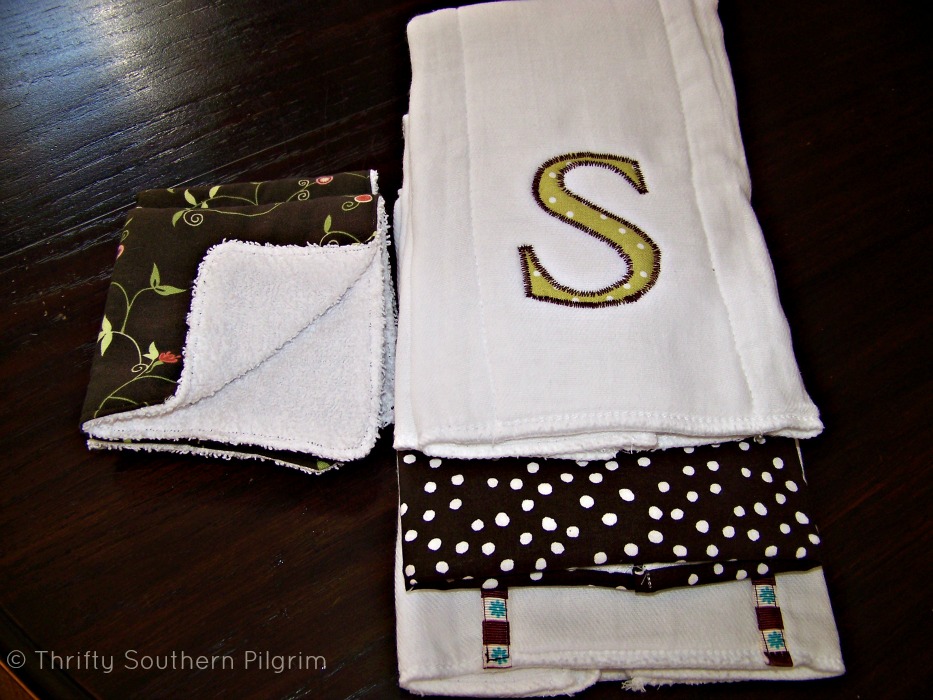
The problem is most people do not buy themselves any cute burp cloths. I like to think the cuteness helps cover the job they are actually doing; Cleaning up 'burps'! For this reason, I love to make burp cloths as gifts for new mothers. I have showed how I made some adding fabric and ribbons in this post. I have made dozens this way and every one tells me they get lots of use!

Today I have something a little different in mind. If you are new to my blog, we are in temporary housing while our house is slowly being built, and I don't have all of my things. I don't have my sewing machine or my huge stash of scrap fabric. So I had to be a little creative when deciding to make some burp cloths for two mother's with new little boys. My post about a month ago where I showed how to monogram napkins using fabric paint inspired me to try fabric paint on the burp cloths. I really did not think it would work. I buy the thick kind of cloth diapers to make my gifts, and I thought the paint may just soak in and not leave clear images. I am happy to report that I was wrong! I think they turned out darling and I can't wait to make more..... This is what I made.


Here is how I made them:
I printed out a picture of a crab, just because.... I also printed out a letter L and H, for the first initials of the two little boys. I then traced it onto my freezer paper, with shiny side down and tracing on the top. I kept the freezer paper over my cutting mat and using the grid lines for reference made marks so that I could use a hole puncher and have a straight line of holes.


Then using my cutting mat and my exacto knife, I cut out the inside of the crab and letters, and hole punched along my grid.


Next, I placed it on my washed and ironed diapers. I adjusted the crab and letter to where I liked and - with the shiny side down - I ironed it to my cloth, paying close attention to all the edges of the image and letter. I also ironed the strip with the holes, lining it up along the bottom edge of the cloth.

Once I was sure all the edges were ironed down tightly, I started painting. I used small bottles of fabric paint purchased from Michael's (yes with a coupon.....). I always paint from the outer edges IN, that way I avoid bleeding under the edges. Then I go around and fill in the inside. This took a little more paint because it did soak in to the thicker fabric in the center, however, it did not take as much as I thought it might.


Once everything is dry, then carefully peel the freezer paper back, being careful not to rip it if you are going to use it again (which I was).


This is a close up of the edge and the dots. You can see the edges are not completely perfect, but they look great considering it is a loose weave fabric. I also love the shimmer in the red paint, I was not expecting that and love it!


A couple more shots....


I hope the babies like them too!


Happy Painting!


Sharing at another Thrifty Chick blog:
TDC Before and After


Please like my Facebook page if you have not done so already! I have just started this page.

The Girl Creative, Stone Gable, From My Front Porch to Yours, Imparting Grace, Have a Daily Cup of Mrs. Olsen , Green Willow Pond, Thrifty Decor Chick

Thursday, May 23, 2013

New Baby Tag Art

Hello Everyone! Today I want to share a really simple and special gift for a new baby. There is a special new baby that I wanted to make a special gift for, including all the really important facts of his BIRTHday! I had a little sneak picture a few days ago on Twitter, now here is the whole thing.


Keep scrolling if you want to see the individual tags up close. I can not take credit for this really cute idea. It came from a book. I have lots of craft books and use them regularly. I love the ideas in this book, and there are sources listed as well as templates.


Here is the picture in the book of the tag art. Mine is a little different, of course. I used what I had and my canvas was not the same size, so I changed it to fit my size canvas. Also, I used paper that I had in my out of control large stash.


This one was a blank cardstock that I stamped with the star stamper in green. I use 2 sided tape to hold most items together. All the tags I eyeballed for size and then cut all the same on a paper cutter. I reinforced the hole (on the back) before using the twine.


The photo tag was printed out from my computer. Obviously my printer needs some help, but I don't think it is as bad in person as it looks in the pictures.....Isn't he a cutie though!!!


I love the ridges on the paper I used for this tag. The L was cut out by hand after tracing the letter onto the paper. I had printed it out in a font I liked and transferred it to the paper. I used an ink pad to get the edges of the square paper colored for a more layered look.


I bought a new tape measure in the sewing department of a store. I cut it and folded it and glued it. I used twine to mark the babies length at birth, gluing it in back.


This might be my favorite tag. I love the look of this one. I printed out the letters and transferred them to the paper and then went over it with a black marker.


For the time tag, I printed out an image of a blank faced clock and used a marker to put the birth time on it.


I cut a few extra tags in plain cardstock and hole punched them. I included extra twine also. This is in case the baby's momma wants to add a footprint. I put the stamp of the cute little giraffe there thinking that would be a good spot to remove the giraffe and put a footprint tag instead.

I checked Amazon and they have the book B is for Baby and it is on sale!!! You know I love a bargain and especially if you have amazon prime (no shipping) this is a deal. This is not an affiliate link, I just put it there for your convenience and because it is a great book for ideas.

Hope you liked this little artwork for a new special baby boy!!!


Have a great day!!!


Linking Up With: House of Hepworths, Beyond the Picket Fence

Friday, February 15, 2013

Personalized Burp Cloth Baby Gift & Card

The first time I sewed personalized burp cloths was when my oldest was born, and he is now 7! I have made so many styles; adding fabric, adding ribbon, adding ruffles, adding bows and any combo of the previous. I loved these when my boys were infants, and they make the best, most used baby gifts!


I recently saw a great tutorial on That's My Letter for adding a letter to the burp cloth. Jaime has such a great tutorial (all her tutorials are fantastic) for this that I won't do one. This is not difficult and is quick to do. You just need to go slowly to get around all those small areas on some letters.
Today I made 3 burp cloths (just purchase the thick cloth diapers - I like Gerber brand); one with fabric, one with ribbon and one with the letter "S" for a new baby named Sophia.
This picture shows how I line the needle on the outside of thin pieces when I want the stitch to be right at the edge of fabric, or in this case, ribbon. This allows the foot to be more centered and hold the material down more securely.

Sorry about the picture quality. I have an old camera that was nice when it was purchased for taking photos on our honeymoon - 10 years ago! I also don't know how to work it very well but am anxious to learn to shoot better pics.

I also had 2 coordinating washcloths to add to the gift. These are simply white terry cloth towel that I cut to size. Then I cut fabric out about 1/4" bigger all around, ironed the edges all in 1/4", pinned right side out to the terry cloth and stitched close to the edge.
Always remember to pre-wash all your fabric before doing any project. When making infant gifts I always wash everything in either Dreft or Woolight.
I also made a card to go along with the gift. I have been making cards for at least 15 years. I have a large stamp collection and 'some' other supplies to go along with it. I do have a Cricut but rarely use it for making my cards. Hard to teach an old dog new tricks!

These are the supplies I used for making this card. I did use double sided tape, a heat tool for the embossing powder and a ruler which are not pictured. I just love the colors on this card.
Have a great day and thanks for reading!


Linking up to I heart Nap Time's Sunday Scoop Link Party