Showing posts with label chalkboard. Show all posts

Thursday, June 20, 2013

Thrift Store Canister Chalk "Label"

In the midst of all the packing and chaos I needed to do something under my control.......so I chose to spray paint. Maybe not the best idea, but it made me happy and I needed that! In between packing up items I was running outside spraying and cutting with my Cricut. Thank goodness my husband was not here - it would just confirm how crazy I am going to get as this moving thing gets more intense!!!

A while ago I found 2 little canisters at a thrift store that my 3 year old could not leave without. They were a cute shape, had lids with rubber gaskets that were intact, had little handles, and were UGLY. Unfortunately my little one broke the smaller canister by swinging it around by the cute little handle.....So I only had 1 ugly canister to fix. Here it is a hot speckled, lid-less and handle-less mess.


I wanted to have a chalkboard label, but wondered if I could just use my chalkboard SPRAYpaint in the shape of a label....hmmmm.....so I sprayed the center area with several coats of chalkboard spray paint.


Sorry for the glare. It was still wet.....remember, I was in a rush to get back to packing all my stuff! I'm amazed that I remembered to take pictures!

Next I cut a shape out on my Cricut in vinyl and put it over the dried chalkboard paint. I made sure the edges were stuck really good.


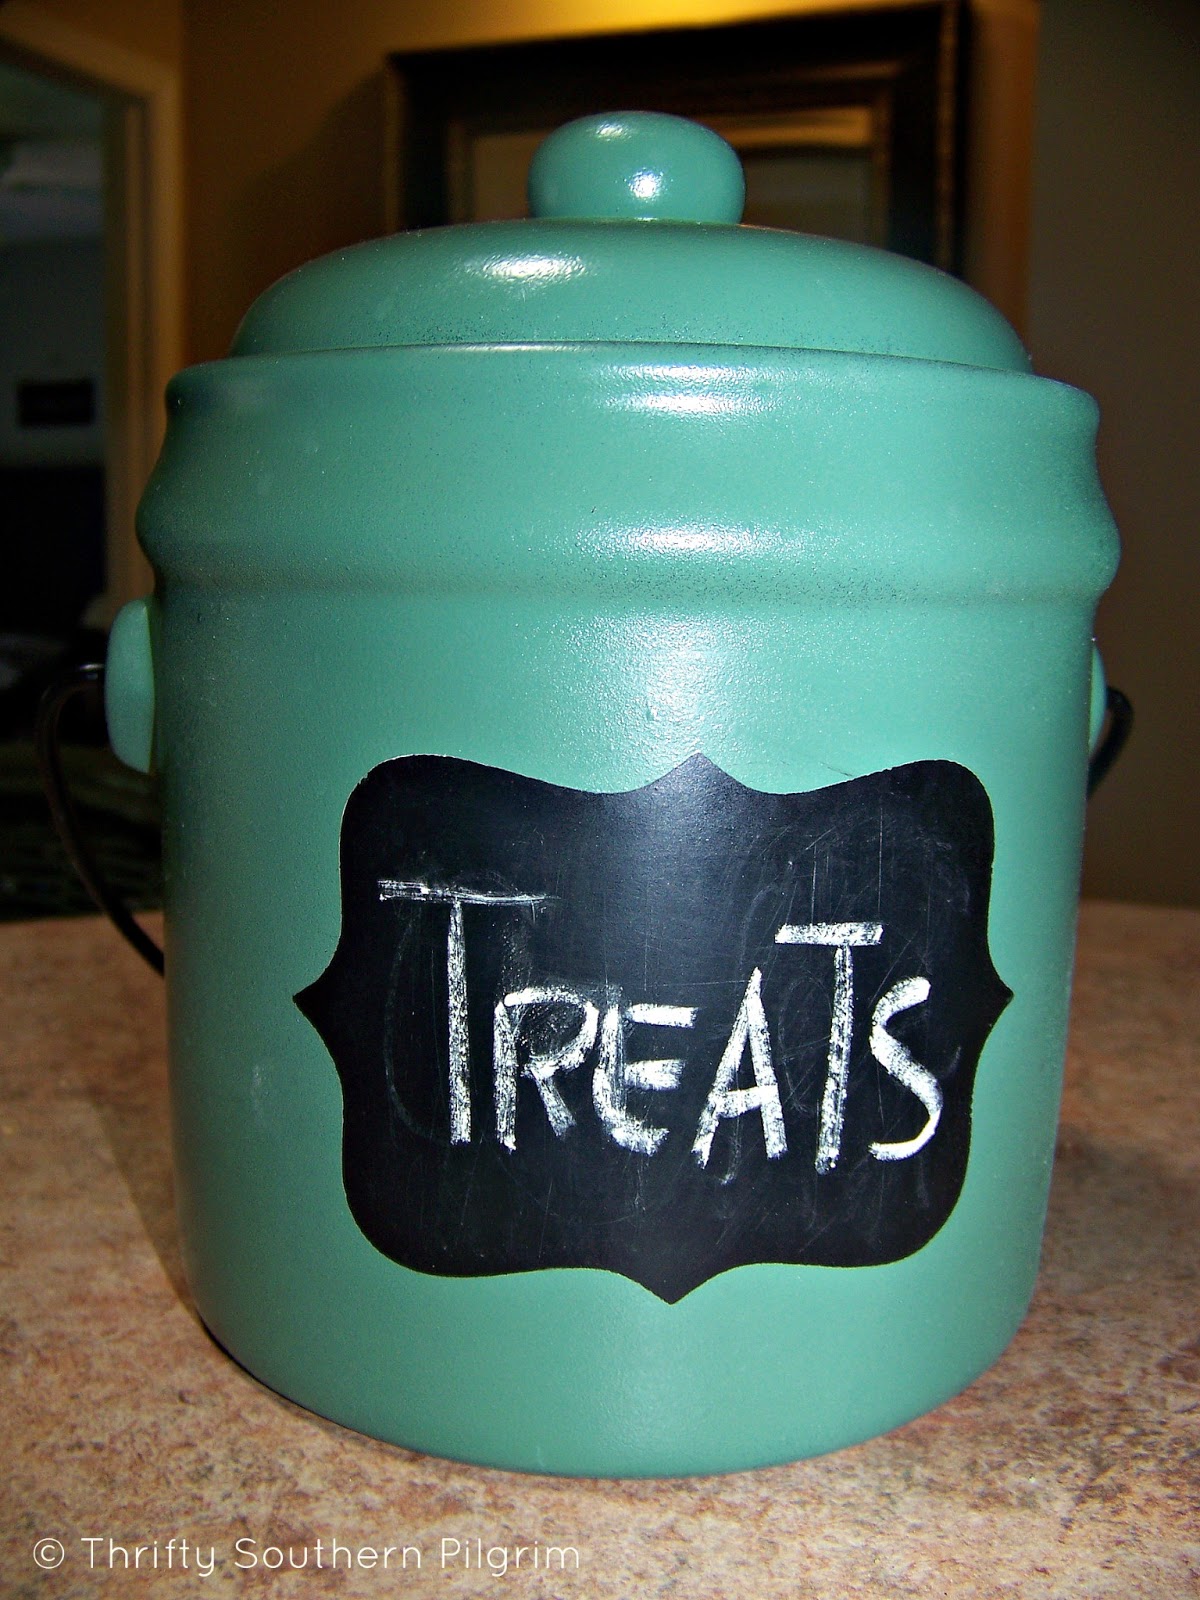
Next I used an old golf club of my husbands (shhhh) to stick the canister upside down on while I held up the stick with one hand and sprayed with the other. I had to do a few coats of paint. Be warned, I could not get the green to look right in the photos. In real life it is not so minty green... After it dried I very carefully got the corner of the vinyl up and peeled it back.


Now I have a cute little canister that I can write whatever I want on it. When the boys asked if there were treats in there for them, I told them it was for dog treats! Not really....but I wanted to squash their idea of getting treats before eating dinner!


I hope you liked my quick little project. A few days ago I went to a local store that carries Miss Mustard Seed paints, and purchased a sample of her Boxwood milk paint, and a jar of Antiquing Wax. I can't wait to use them. I think I will be in big trouble if I try to squeeze this project in before moving day next week!!! I will post about it when I do it!

Have a great weekend y'all!

(I can't help it - that is my favorite southern saying and I use it too much for my northern upbringing.)


I'm linking up with there great blogs: House of Hepworths, The Shabby Creek Cottage,

Wednesday, May 1, 2013

A little Chalkboard sign fix

Good Morning! It has been too long. We had a busy 2 weeks and we have some very exciting things in the works. But I can't talk about it just yet. Soon......I will share!

I bought a frame over a year ago and turned it into a chalkboard. I love the way it looks, but the problem is the surface that the chalkboard paint is on. It is very bumpy and rough. I thought it would be okay, but it is terrible to write on, and even worse to wipe off. Isn't the purpose of having a chalkboard so that you can write, wipe off, write, wipe off etc? Yes, I thought so. Anyways, the same thing has been written on there for a year. Time to change that.

Here is the frame as I bought it. Yikes! Who would buy this and who would pass it by?


I made the mistake of trying to peel the eagle part off of the hard back. Well, part peeled off and other parts did not so I was left with a rough mess. I could not spray chalkboard paint over that, so I did the logical thing and turned it over. The back had little tiny bumps all over.... You know how that turned out! Here is a closeup of the price and you can see the little bumps peeking out.


I went to Home Depot and looked in the scrap wood section. Do you all know what I am talking about? In case you don't.......it is in the very back of the lumber section in a cart. This cart sometimes is full and other times not so full of any kind of wood or trim pieces. They are all different sizes, as they are left over from a bigger cut, or an error cut. They are all sprayed with a color and that color tells you how much they are. I think $4.00 is the most expensive.

I bought a smooth plywood for $4.00. It measures 24" X 48" X 3/16". I don't know exactly what type of wood it is, just that it was thin and I was hoping it would not be too thick for my frame.

I traced the shape of my bumpy board on it and cut it out with my circular saw. Then sanded it and sprayed it with chalkboard paint like the directions said.

It took a few days to spray and dry because we had rainy days. But this is how it turned out. Nice and SMOOTH!!! I can erase and write something new every day!!


Here is a close up of the frame. I LOVE those old frames that have this rough burlap between layers of the frame. Some are nicer and have a more linen looking fabric, but truthfully I love either look!


This hangs on the laundry room wall and greets us when we enter from the garage. You can see the whole wall with most of the frame here.


I'm sharing with: Savvy Southern Style, DIY by Design, Green Willow Pond, I Gotta Try That
TDC Before and After