Friday, August 30, 2013

Thrifty Finds Friday #2

Hope you all have a great week. I had a great week and have a few treasures to share with you all. This week they all came from Goodwill, 2 different store locations though. I am finding all these treasures because I will need use them when we move in to the new house. But for now we have NO storage and Mr. Thrifty will get mad if I keep bringing these things home. So lets all hope that the house gets going soon. That is a story for another day.....

Here are my finds:

First up. Stunning silver tray.


This tray is BEAUTIFUL people. I know that I can use it for serving and parties. I also may use it in my bathroom on the counter to hold perfume and apothecary jars of necessities.

Second find; a cracker and pick set.


My parents have lots of these and we use them every summer for when I am home and request that I have a big lobster dinner! You can't eat lobster without crackers and picks, unless the lobsters have recently molted. I would love to have found more, but this was it. My oldest son loves crab legs and the cracker I currently have does not work as good as these do, and I do not have a pick.

Third find is a set of 3 mixing bowls from Williams Sonoma.


These bowls are ceramic and flawless. I do way to much lots baking, and I am always cooking, so I will use these a lot. They are an off white color. They will be used daily at my home.

Have you found any great finds lately? Have a great Labor Day weekend with family and friends!

Monday, August 26, 2013

DIY Paper Gift Holder

Hi there! I have a quick and easy little project for you all today.


Last week I was in need of a cute holder for some little gifts that I was sending in the mail.

My requirements were:
* Lightweight and able to fit in a padded envelope
* Cute
* quick to make
* cheap inexpensive

does that last one shock you? I kid.....

I thought of a pair of earrings that I was given for my birthday this summer. They came in a cute little paper pouch with the store name on the front. I did not throw it out (of course) thinking that I may re-use it.

Well, instead of reusing it, I chose to copy it to make as many as I wanted in colors that I chose. The original white one became my template. Here you see the original packaging in white and the cardstock paper I purchased for 50% off of $0.59. That's less than $0.30/each!


This picture (with a very BAD shadow - oops - photographer I am not) shows how you hold and pinch the sides a bit to get it to pop open. Then you fold in the rounded end areas to close it.


I traced around it and made a template out of an old manilla file folder. Then I used that template to trace and then cut out a shape from one of my colored pieces of paper.


Have you all used a bone folder? It is such a small tool that is so awesome! When you fold a piece of paper and want a really crisp fold without any bumps, use a bone folder. I also use mine to score paper for folding. It can be used for other things I am sure.... Here I am showing how to use it when you fold the paper in half, making certain to line up the top and bottom curved edges.

This picture does not show how I fold over the small flap left that is how it becomes a pouch. You will be able to see this on the template at the end of this tutorial. After folding it over and pressing the fold with the bone folder, I used a glue stick to secure it.


Next I made a small template of where the fold was on the original white packaging. I used a manilla file folder for this too. Then I placed this on the outside of my newly folded pocket and lining up the corners I scored along the edge with the bone folder. The curved end you see is the opposite end of the bone folder you see in the previous picture. (In this photo I had folded it and then opened it flat to do the scoring. You can do it anyway you like. It worked quickest for me to do this after it was folded in half and to NOT open it up flat)


This next photo shows how you fold in the flap with the cut out first. That way when you open it you can just put your finger in that little spot and open it easily without bending it. When you first fold it the score will tell you where to fold and you just need to give it a little assistance to fold on that score line. Depending on the thickness of your paper and how you scored the paper, will determine how easily this folds. I did find that without scoring using the template, I had a mess of a fold and it did not look nice and neat at all.


This shows the contents and size of your holder. You could put some tissue paper in or some shredded/confetti paper. It could be used for jewelry, gift cards, little items like mine or really anything that will fit in there! The possibilities are endless. I chose to tie colored twine around the outside of mine. You could easily add a sticker with a label, decoration, a "To: From: " tag, or anything at all.


My TOTAL COST: $0.30 each!

The only purchase was the paper. I had a glue stick, bone folder, and twine in my stash.

Do you want to make your own?

Click HERE to get your own template for a cute DIY Paper Gift Holder!


Thanks and have a great day. Please let me know if you can't get the template to work. It is my first time scanning and using something that is to scale and it should work....but should work doesn't mean it does work!!!!

I would love to see any pictures of your creations!


Today I'm linking up to:
Lines Across, Between Naps on the Porch, Rain on a Tin Roof, Making the World Cuter, Dwellings, Life with the crust cut off , Thrifty Decor Chick

Monday, August 19, 2013

Old Cabinet doors Re-Invented

Happy Monday to you!

So today I am sharing a project that has taken me a while (note: definition of that time frame is open to interpretation - he. he. he.) to complete. I had two doors from an old vanity unit that I found on the side of the road.


I moved the doors with us and painted them with Miss Mustard Seed milkpaint in Boxwood, while I painted my little Duncan Phyfe table. That was before vacation.

Here is a picture of how the paint looked before and after using Miss Mustard Seeds Antiquing Wax.


Refer to my post on painting a $4 yard sale table to see how I mixed the Miss Mustard Seed milk paint and painted with it.

After vacation I spray painted the insides of the doors with chalk paint. Of course I chose a day that was 95 degrees and very high humidity to do this so it took a long time to dry correctly! Benefit of living in the South! Here is a picture before I removed my protective tape and paper used to shield the painted edges.


After removing the tape and paper and THREE coats of chalkboard paint....


After waiting a day to cure, I rubbed chalk all over the doors and they were ready to write on. br>
I decided to use these as signs for my kids on their first day of school to let everyone know (and so I can remember 20 years from now) what grade the pictures were from. I think they look cute as signs, but my kids are even cuter!


Who knows what they will be used for in the new house. Some of my ideas include:

** hang horizontally and mount a towel bar on the bottom and each child gets their own
** hang horizontally and use small hooks across the bottom and use as a key holder
** hang vertically and use as a grocery list
** other ideas????


Thanks for stopping by and have a great week!!!!


Linking up with: Green Willow Pond, Savvy Southern Style, DIY by Design, Balancing Home, Thrifty Decor Chick

Friday, August 16, 2013

Thrifty Finds Friday

Well hello there. Did you think I left you?

Coming back from vacation is no easy task! I kid...... kinda......

Well we are back and getting ready to start school Monday! Eek!

I have a few items I found at 3 different thrift stores that I stopped by yesterday after work. I am going to try to do this 1 - 2 Fridays a month. Anyways, here are my finds and how much they cost me. I will try to show you the items and then the cost as well as what my plans are for them.


How awesome is that baskety thingy? I was so excited to see it and take it home. And it is big. I love the color and the texture and want it on the wall. This is what I picture doing with it when we move to our new house.


Katrina Scott Design


BHG.com via Pinterest


I am sure some of you are wondering about the NASTY dried and silk flowers in this thing. I think they are nasty too. But they will be gone! I may hang this outside with a battery candle in it, or inside with a real little nest and some eggs, or a ceramic bird. Not sure yet, but I do know that for $.50 it is worth a shot!


These handles are UH.MAY.ZING!!!! They are from the ReStore and that was all I could find. I am not sure what I will use them for, but they are the real deal. They are solid and heavy. I will most likely spray paint them like the cup pulls in my old kitchen, and use them in my new laundry room. I will have lots of projects in there. We opted to not pay $500 for cabinets in our laundry room, and instead I will put them in myself. Then I can have space for a bar for hanging clothes, a rack for drying and it will be a totally custom job. AND I will be able to use all my new hardware that I just spent a fortune on. He he.

Can't wait to show you these in the new house!

I'll be back Monday with a back to school sign for the first day of school pictures. Check back soon, or subscribe my email on the side bar!

Friday, August 2, 2013

Snapshots of Plymouth

I have been on vacation for more than a few weeks - hence the lack of posts. One of those weeks I was totally off the grid - no TV, no telephone, no cell service, no internet...... it was so FREEING! I can't explain how awesome it feels to not carry your phone with you everywhere and to never wear a watch because it just doesn't matter what time it is. Those of you who have had similar vacations, you know how incredible that feels.

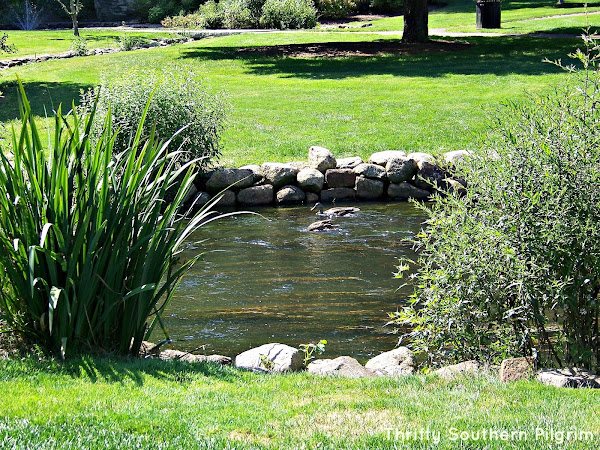
This is the lake where I was off the grid. I have been to this lake every year of my life (I may have missed one or two......). So that is A LOT of years!!


However after one week, just like that it was over. We were in the car driving home and as soon as we got in cell phone range I loaded all my emails and read them all!

So, this post is about nothing DIY or homemade at all. I just thought I would share some photos of my hometown. I really did not take too many and missed some great spots to take photos, but these do represent a coastal New England town well (in my teeny tiny opinion).


A whole lot of ocean, an old Cape Cod, an 1886 home that has been loved again, of course some lobster pot buoys, the Plimouth Plantation sheep, and the bluffs, in no particular order.

I hope you enjoyed these pictures of my hometown and got a glimpse of how cool it is! Hope you are enjoying your summer and your vacations, wherever they may take you!

Thank you for stopping by, I will be back in another week...or so......and will have more regular posts then.


Linking up with some cool blogs like:
Tater Tots and Jello