Well, it has been 6 weeks since we moved in and I have FINALLY completed installing the kitchen cabinet hardware. I did not upgrade the cabinet hardware, because
So I bought a template (this is the greatest, cheapest, tool EVER), and installed the knobs on all the upper cabinets. I don't love them, but I also don't like handles on upper cabinets, so I know that anything I change out with will also be a center hole. That was easy to do.....
For the drawers, all 14 of them, I decided on the same cup pulls I installed in our last home. Good news: I know I love them. Bad news: They are a giant pain to install.
This is what I installed in my last home.
What I purchased was not 75 cents, and did not have to be spray painted. I bought them off ebay and they came oil rubbed bronze. But they are identical, and are called Nantucket Pulls (which of course makes me love them more).
First Step: Gather Your supplies.
Not shown: drill including phillips head and multiple sized drill bits, tape measure, painters tape, scrap piece of wood for putting under drawer when you drill through and template for cabinet hardware (I found at Home Depot).
Next: Remove drawer fronts from drawer.
Next: Measure (measure TWICE, cut (or drill) ONCE). I actually measured many times. I put painters tape on the drawer front and found center. Then marked a center line. I then used my template (sorry no photo) with all the wrong holes taped off so no room for error, and marked where I would drill. I double checked with the pull before I drilled. I also chose to do the island first, because the wood is dark and it faces the kitchen, so you have to be standing in the kitchen to see it. The white cabinets you can see from the eating area and family room.
The next part gets confusing. I drilled a hole on each mark using the high powered drill bit that came with the template. That really made a difference. I placed a scrap piece behind the drawer for a clean hole at the back, and so I would not damage my counter.
Then I used a paddle bit to make a counter sunk hole on the back. When your screw is in, you don't want it to stick out because the drawer back has to sit flush on the drawer.....
Of couse these pulls do NOT sit on the surface. They have little "legs" that you have to drill a wider hole for them to sit in so the whole pull part rests on the drawer surface. So I used 2 sizes of drill bits to make the holes larger without going all the way through to the back. This took for.ev.ah.
For the occasional not smooth hole, I used a furniture pen on the dark drawers, and white paint applied with a toothpick on the white drawers. No one will notice.
Then I screwed the handles in with the screws that came with the hardware. And then put the drawer fronts back on, watching to make sure they were level and aligned correctly.
Giant pain, but it looks so, so pretty!
I can't believe I did not take photos of the white drawers, but we are out of town right now so I can't do it. I will add photos when we return!
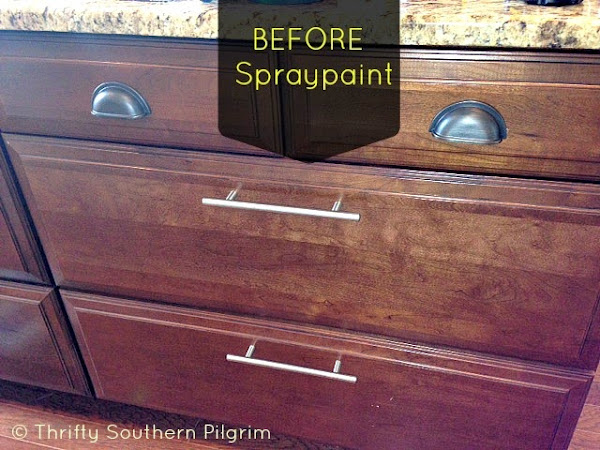
On the island I have 4 larger drawers that the raised panels are 33" wide. I was hoping for 15" pulls but could not find any I thought would look good with the pulls. I also need them to be long, since the drawers are so big. What I found was stainless steel. Well, I know how to fix that! I did it before in our last kitchen. This shows the pulls in a silver finish.
And after oil rubbed bronze spray paint. I did not take a photo of the can, but it was the ONLY ORB that was not in a hammered finish (at Home Depot).
And after.....
I promise I will update in a few days with more pictures. Just remember, if you can't find what you want in the right finish, you cal always fix that!!!!
Have a great weekend and thanks for reading!!!
**UPDATE: Extra photos of white cabinets (complete with dirty counters...)
Linking up with:
 CFFParty
The Dedicated House,
The Pin Junkie,
The Shabby Nest


No comments:
Post a Comment
Thank you for taking the time to comment. They really make my day!